Easy Crochet Polar Bear Hat Pattern: Free Step-by-Step
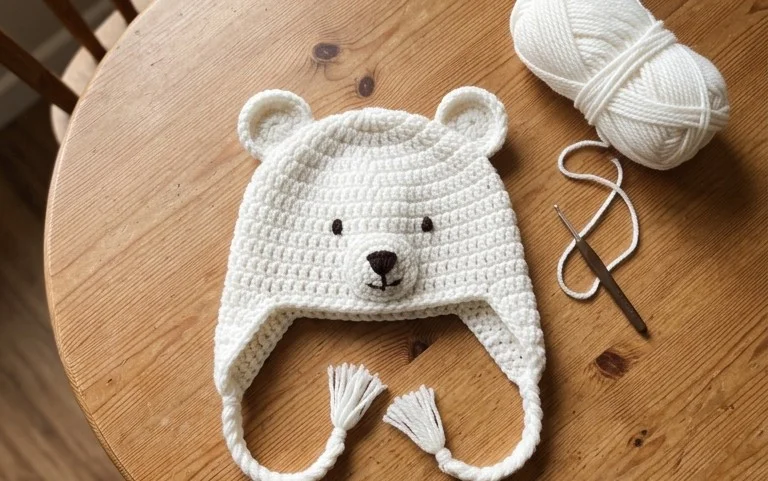
White wool stitches form a dense and warm fabric that stands up well against biting winter winds. This simple winter accessory features two rounded ears sewn firmly to the crown, adding a playful character to an otherwise basic beanie design. It suits beginners who feel comfortable with half double crochet stitches and those who want to finish a thoughtful gift in just one sitting. You will learn how to create a flat rectangle that transforms into a cozy garment through basic seaming and gathering techniques. This project brings a bit of handmade charm to your seasonal wardrobe without requiring expensive specialty yarn or complicated stitch patterns.
Why You’ll Love This Pattern
This classic crochet beanie works up quickly using a basic half double crochet stitch, making it an ideal weekend project. The texture is dense enough to provide real warmth during chilly months without becoming overly stiff or heavy. Because the pattern relies on a simple row-based construction worked flat and seamed, it is highly accessible for those new to garment making. You can easily adjust the height of the hat by adding or removing rows, allowing for a custom fit that works for any head size from toddler to adult.
I managed to finish this hat in a single afternoon while watching a movie. The instructions were very easy to follow and the final result fits perfectly.
— Sarah, hobbyist crocheter
Pattern Overview & Skill Level
- Skill Level: Beginner
- Approximate Time: 3 to 4 hours
- Construction: Worked in flat rows to form a rectangle, then seamed at the side and gathered at the top
- Finished Dimensions & Sizing: Adult Medium (fits 21-22 inch head circumference); 9 inches tall by 10 inches wide
Materials & Supplies Needed
- Yarn: Worsted weight (#4), 100% wool or acrylic blend, approximately 200 yards.
- Hook Size: 5.0 mm (US H-8).
- Notions: Tapestry needle for weaving in ends and seaming, stitch markers to track row ends, measuring tape.
- Safe yarn substitutions: You may use cotton yarn, though it will result in a heavier hat with less stretch; if substituting a lighter weight yarn, you must hold two strands together or increase your starting chain length to match the gauge.
Stitch Guide & Abbreviations (US Terms)
- ch = chain
- hdc = half double crochet
- sl st = slip stitch
- BLO = back loop only (insert hook under the back loop of the stitch instead of both loops to create ribbing)
- st = stitch
Step-by-Step Pattern Instructions
Main Hat Body
You will work the hat as a flat rectangle. The ch 2 at the start of each row does not count as a stitch.
- Row 1: Ch 42. Hdc in the third ch from the hook and each ch across. (40 sts)
- Row 2: Ch 2, turn. Working in BLO, hdc in each st across. (40 sts)
- Rows 3–60: Repeat Row 2 until the piece measures approximately 20 inches in length when slightly stretched. (40 sts)
Assembly and Finishing
- Fasten off, leaving a long tail of approximately 15 inches for assembly.
- Fold the rectangle in half so the short ends meet.
- Using your tapestry needle and the long tail, sew the two short edges together using a whip stitch to form a tube.
- Turn the piece inside out so the seam is on the inside.
- Use a separate length of yarn to weave in and out of the stitches along the top edge of the tube.
- Pull the yarn tight to cinch the top of the hat closed and secure it with a knot.
- Weave in all remaining yarn ends securely on the inside of the hat.
Care & Washing Instructions
- Hand wash in cool water using a mild wool-safe detergent to maintain the integrity of the fibers.
- Lay the hat flat on a clean towel to air dry, reshaping it while damp to ensure it retains its circular form.
- Do not wring or twist the item, as this can stretch the stitches out of proportion and ruin the shape of the brim.
Pro Tips & Common Mistakes to Avoid
Maintaining consistent tension is essential for a professional look; if your stitches are too tight, the hat will be difficult to stretch over your head. Always place a stitch marker in the first stitch of every row to ensure you do not accidentally skip the final stitch, which causes the edges to slant. When weaving in ends, run the needle through the center of the stitches rather than across the surface to keep the finish invisible. If you decide to adjust the height, remember that changing the number of starting chains will require you to add more or less yarn, so ensure you have enough yardage before you begin.
Frequently Asked Questions
Can I substitute the yarn for a different weight?
Yes, but you will need to adjust your starting chain and row count to match the measurements provided. Holding a lighter weight yarn double is a common way to achieve the correct gauge without rewriting the pattern significantly.
Is this pattern suitable for someone who has never crocheted before?
It is an excellent choice for a beginner. The project uses only one main stitch and requires no shaping, which allows you to focus entirely on maintaining even tension throughout the rows.
How do I make the hat larger for a different head size?
To increase the circumference, add chains to your starting row in multiples of two. To increase the height, simply work more rows before finishing, but be aware this will require extra yarn.
Am I allowed to sell hats made from this pattern?
You are welcome to sell finished items created from this pattern. I ask that you credit the design work and use your own photographs when listing items for sale in your shop.
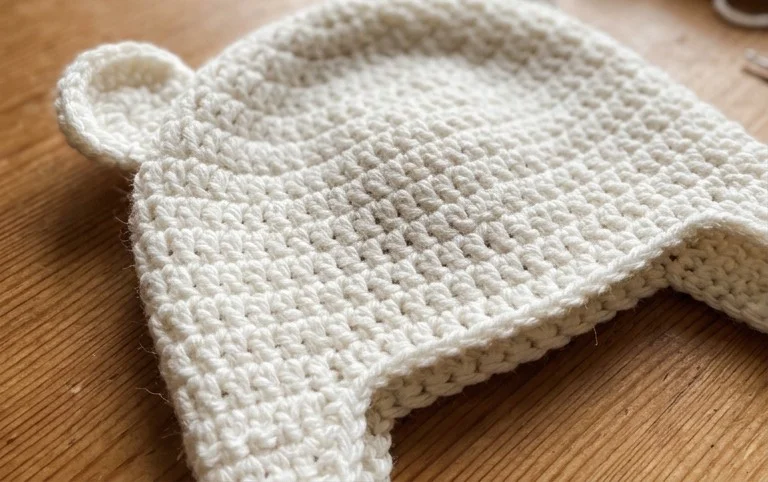
A finished hat with cute animal ears provides a cozy way to keep your head warm during the coldest months. Consider using a soft alpaca blend for extra fluffiness or adjusting the foundation chain to create a matching set for children. Posting a photo of your project on social media inspires other makers to start their own winter projects. Please visit the rest of the blog to browse more free patterns that rely on simple construction and accessible yarn choices for your future craft sessions.