Easy Men’s Crochet Mittens Free Pattern for Winter
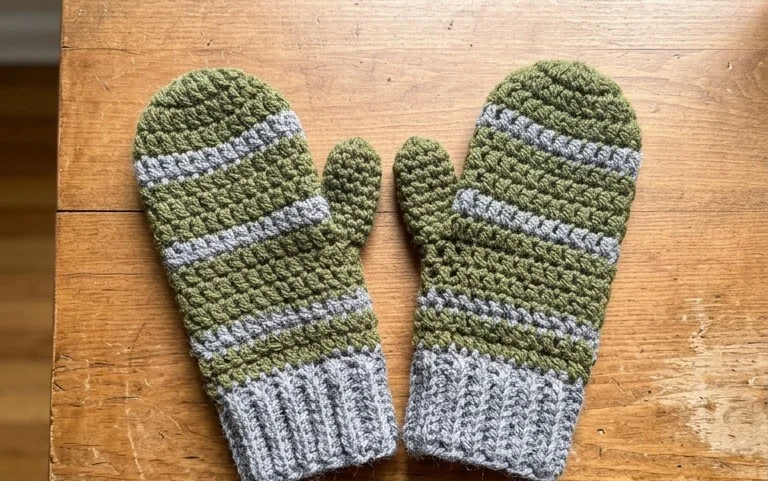
Worsted-weight yarn gives these winter mittens a warm, sturdy feel, with a simple shape that works well for men and teen boys. They are practical to wear on cold walks, and they make a thoughtful handmade gift that can be finished in a favorite color. The pattern suits beginners who are ready to practise keeping their stitches even, as well as gift makers and people who usually crochet useful pieces for the home. You’ll learn how basic crochet stitches form the mitten fabric and how the thumb shaping comes together. Working through a pair is satisfying because each mitten takes shape in manageable sections, and the second one gives you a chance to match the first. Choose a soft yarn that feels comfortable against the skin, and check the fit as you go.
Why You’ll Love This Pattern
A square of cotton yarn makes a useful dishcloth for washing dishes, wiping counters, or keeping beside the sink. This beginner-friendly pattern uses single crochet in straight rows, so you can practise even tension without tracking increases or decreases. The simple shape is easy to check as you work, and the cloth is a practical way to use leftover cotton yarn if you have enough for the full piece.
Each row repeats the same stitch, making this a steady project to work on while listening to a podcast or watching a show. The finished cloth is also a useful handmade gift; fold it with a bar of soap or a small kitchen item. Use the pattern as written for a square measuring about 7 inches across.
The rows were easy to count, and my cotton cloth came out square after I checked the edges as I went.
— Maya, sample crocheter
Pattern Overview & Skill Level
- Skill Level: Beginner. You need to know how to chain and make single crochet stitches.
- Approximate Time: About 2–3 hours, depending on your pace and tension.
- Construction: Work flat in rows from the bottom edge upward. The pattern has no shaping or separate pieces.
- Finished Dimensions & Sizing: About 7 × 7 inches (18 × 18 cm) after washing and drying. The size is based on a gauge of 4.5 single crochet stitches and 4.5 rows per inch.
Materials & Supplies Needed
- Yarn: About 75 yards of worsted-weight cotton yarn, also called medium weight or #4. Choose one color, or use a second color for the final row if you have enough yarn. Cotton absorbs water and holds up to frequent washing.
- Hook Size: 5.0 mm / H-8 crochet hook. Check the gauge before beginning; change hook size if your cloth is much larger or smaller than the stated gauge.
- Notions: Tapestry needle for weaving in the ends, scissors, and a ruler or tape measure. Stitch markers are optional but can help mark the first and last stitch of a row.
- Substitutions: A similar worsted-weight cotton or cotton blend can work. A thicker yarn makes a larger, heavier cloth and uses more yarn; a finer yarn makes a smaller, thinner cloth. Check the yarn label for care advice, especially when using a blend.
Stitch Guide & Abbreviations (US Terms)
- ch: Chain. Yarn over and pull the yarn through the loop on the hook.
- sc: Single crochet. Insert the hook into the indicated stitch, yarn over and pull up a loop, then yarn over and pull through both loops on the hook.
- st: Stitch.
- sts: Stitches.
- Gauge: The number of stitches and rows measured over a set area. For this pattern, aim for 4.5 single crochet stitches and 4.5 rows per inch.
For a tidy edge, make the first single crochet of each row in the first stitch, directly beside the turning chain. The turning chain does not count as a stitch.
Step-by-Step Pattern Instructions
Dishcloth
Before you begin: The turning chain at the start of each row does not count toward the stitch total. Work into every stitch across, including the final stitch at the edge. Keep your loops an even height so the sides stay straight.
- Row 1: Ch 33. Sc in the second ch from the hook and in each ch across. Turn. (32 sts)
- Row 2: Ch 1. Sc in each st across. Turn. (32 sts)
- Rows 3–32: Repeat Row 2. Work 32 sc in each row, then turn. (32 sts in each row)
Finishing
After Row 32, cut the yarn, leaving a tail of about 6 inches. Pull the tail through the loop on your hook to secure it. Thread the tail onto a tapestry needle and weave it through several stitches on the wrong side, changing direction once so it is less likely to work loose. Weave in the starting tail the same way.
Lay the cloth flat and measure it. If it is close to 7 inches square, wet-block it by dampening it, shaping it gently, and letting it dry flat. If your gauge is different, the finished size may vary; check the care label before washing or blocking.
Care & Washing Instructions
- For cotton yarn, machine-wash with like colors on a gentle or normal cycle using cool or warm water, up to 40°C (104°F), unless the yarn label gives different directions.
- Reshape the cloth and dry it flat; avoid high dryer heat, which can shrink cotton or make it feel stiff.
- Block while damp by smoothing the sides into a square, then let the cloth dry flat; follow the yarn label if you used a blend or a different fiber.
Pro Tips & Common Mistakes to Avoid
- Keep the tension even: Make the loops on your hook a consistent height. Very tight stitches can make the cloth stiff, while loose stitches can leave a floppy fabric with larger gaps.
- Count the edge stitches: Check that each row has 32 stitches before turning. If the sides begin to slope, you may be skipping the first stitch or adding an extra stitch at the end. Place a marker in the first and last stitch if those edges are hard to see.
- Hide the yarn tails securely: Weave each tail through the backs of several stitches, then change direction. Avoid cutting the tail flush with the fabric before it is secured.
- Change the size carefully: To make a wider cloth, add chains to the foundation, then work one single crochet into each chain after the second chain. Each added chain adds one stitch across and uses more yarn. Add rows to make it taller; both changes increase yarn use.
Frequently Asked Questions
Can I use acrylic yarn instead of cotton?
You can, but acrylic absorbs less water than cotton and may not work as well for wiping dishes. The cloth may also feel softer or stretchier. Use a similar worsted weight, check the gauge, and follow the yarn label for washing.
How can I make the dishcloth smaller?
Start with fewer chains, keeping an odd number so you can work into the second chain from the hook and reach your chosen stitch count. Work fewer rows to make it shorter. Measure as you go, since changing the hook or yarn also affects the finished size.
Is this pattern suitable for a first crochet project?
Yes, if you are comfortable making a chain and single crochet. The main challenge is placing the first and last stitch consistently. Count each row and use markers at the edges until you can see the stitches clearly.
May I sell dishcloths made from this pattern?
Check the designer’s terms before selling finished items, and follow any credit or usage conditions they provide. If you sell your work, describe the yarn and care instructions accurately so buyers know how to wash the cloth.
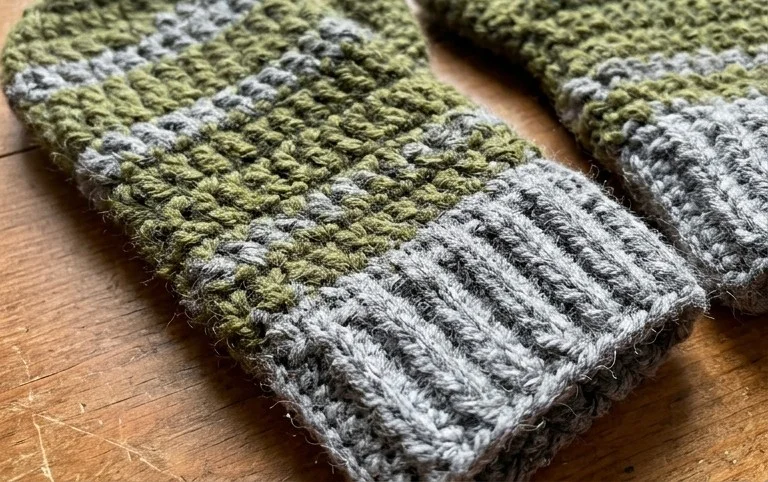
A finished pair of mittens is a practical project to give or keep by the door for cold mornings. Take a moment to check that both thumbs sit comfortably and that the cuffs cover the wrists without feeling tight; small fit adjustments make a big difference when the mittens are worn outdoors. For a simple variation, choose a contrasting color for the cuffs while keeping the mitten bodies in one shade. If you make a pair, share a photo on Pinterest or your favorite social media platform so other crocheters can see your colors and finished fit. You can also browse the blog for more free crochet patterns, from useful everyday pieces to handmade gifts for the colder months.