Granny Square Bandana: Free Beginner Crochet Pattern
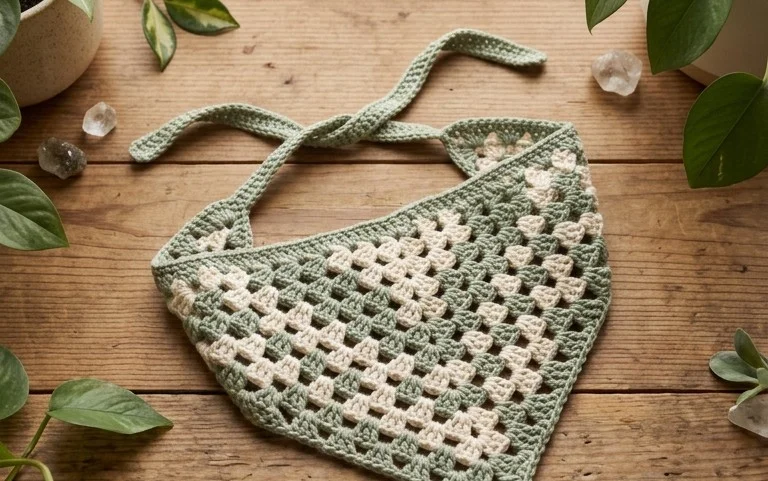
A triangular head scarf offers a breezy, retro look that sits comfortably against your hair without slipping during daily errands. This project transforms the traditional motif into a lightweight accessory using simple double crochet stitches and chain spaces. Beginners often enjoy this pattern because it provides immediate results without complex shaping or intricate counting. You will learn to manipulate basic clusters to form a balanced triangle while maintaining a consistent tension throughout the piece. Whether you need a quick gift for a friend or a stylish way to keep your hair back, this construction remains a reliable go-to choice for makers.
Why You’ll Love This Pattern
The Classic Crochet Granny Square is the foundation of countless heirloom projects, offering a repetitive, meditative rhythm that is perfect for honing your tension. Because this pattern relies on simple clusters of double crochet stitches, it is highly accessible for those just learning how to manage multiple loops on their hook. You can complete a single square in about 15 minutes, making this an ideal project for using up small amounts of leftover yarn. The modular nature of these squares means you can assemble them into anything from a small coaster to a full-sized bedspread.
I started these squares as a way to practice my consistency, and now I have enough to make a full throw blanket for my guest room. The pattern is easy to memorize after the third round, which makes it my favorite carry-along project for travel.
— Sarah, intermediate crocheter
Pattern Overview & Skill Level
- Skill Level: Beginner
- Approximate Time: 15–20 minutes per square
- Construction: Worked in joined rounds, starting from the center and expanding outward
- Finished Dimensions: Approximately 5 inches by 5 inches using worsted weight yarn
Materials & Supplies Needed
- Yarn: Worsted weight (#4), acrylic or cotton blend, approximately 15 yards per square.
- Hook Size: 5.0 mm / H-8
- Notions needed: Yarn needle for weaving in ends, sharp scissors.
- Safe yarn substitutions: Any weight yarn works, though size will change accordingly. Use a thinner yarn like DK (#3) for smaller, delicate squares or bulky (#5) for faster, larger squares. Adjust hook size down for thinner yarn and up for thicker yarn to maintain a firm fabric.
Stitch Guide & Abbreviations (US Terms)
- ch = chain
- st = stitch
- sl st = slip stitch
- dc = double crochet
- dc cluster = 3 double crochet stitches worked into the same space
- sp = space
- MR = magic ring
Step-by-Step Pattern Instructions
Granny Square Body
- Rnd 1: Start with a MR. Ch 3 (counts as first dc), work 2 dc into the ring, ch 2. *3 dc into ring, ch 2. Repeat from * 2 more times. Join with a sl st to the top of the beginning ch-3. (12 dc, 4 ch-2 sps)
- Rnd 2: Sl st into the next 2 sts and into the first ch-2 sp. Ch 3, 2 dc in same sp, ch 2, 3 dc in same sp (first corner made). *Ch 1, skip 3 sts, (3 dc, ch 2, 3 dc) in next ch-2 sp. Repeat from * 2 more times. Ch 1, join with sl st to top of beginning ch-3. (24 dc, 4 ch-2 corner sps, 4 ch-1 side sps)
- Rnd 3: Sl st into next 2 sts and into the corner ch-2 sp. Ch 3, 2 dc in same sp, ch 2, 3 dc in same sp. *Ch 1, 3 dc in next ch-1 sp, ch 1, (3 dc, ch 2, 3 dc) in corner ch-2 sp. Repeat from * 2 more times. Ch 1, 3 dc in next ch-1 sp, ch 1, join with sl st to top of beginning ch-3. (36 dc, 4 ch-2 corner sps, 8 ch-1 side sps)
- Rnd 4: Sl st into next 2 sts and into corner ch-2 sp. Ch 3, 2 dc, ch 2, 3 dc in same sp. *Ch 1, (3 dc in next ch-1 sp, ch 1) across side to next corner. (3 dc, ch 2, 3 dc) in corner sp. Repeat from * 2 more times. Ch 1, 3 dc in next ch-1 sp, ch 1, 3 dc in final ch-1 sp, ch 1, join with sl st to top of beginning ch-3. (48 dc, 4 ch-2 corner sps, 12 ch-1 side sps)
Finishing
Once you have reached your desired size, fasten off by cutting the yarn, leaving a 6-inch tail. Pull the tail through the final loop and tighten. Use your yarn needle to weave the end through the back of the double crochet clusters to secure it firmly before trimming the excess.
Care & Washing Instructions
- Machine wash your finished squares on a gentle cycle using cool water.
- Lay the squares flat on a clean towel to air dry, reshaping them to a perfect square while damp.
- Avoid using high heat in the dryer, as it can cause acrylic fibers to lose their stitch definition or melt.
Pro Tips & Common Mistakes to Avoid
- Maintain consistent tension by holding your yarn with light, even pressure; if your clusters look too loose, try going down half a hook size.
- Place a stitch marker in the first stitch of each round to avoid losing track of where your round begins, which is a common error in circular construction.
- Weave your ends in diagonally across the back of your stitches for a cleaner, more professional finish that won’t pull out during use.
- Adjust the size of the square simply by adding more rounds; remember that each additional round adds 12 dc stitches to your total count and requires more yarn.
Frequently Asked Questions
Can I use a different weight yarn for this project?
Yes, you can use any yarn weight. Keep in mind that using a lighter yarn will result in a smaller, tighter square, while a heavier yarn will create a larger, chunkier square.
Is this pattern suitable for complete beginners?
This pattern is perfect for beginners because it uses basic stitches and a repetitive structure that helps you master tension and counting without complex shaping.
How do I join these squares together?
You can join squares using a whip stitch with a yarn needle or by using a single crochet join along the edges for a more decorative, textured seam.
Can I sell the items I make from this pattern?
You are welcome to sell finished items made from this pattern, provided you credit the designer and use your own original photographs for your listings.
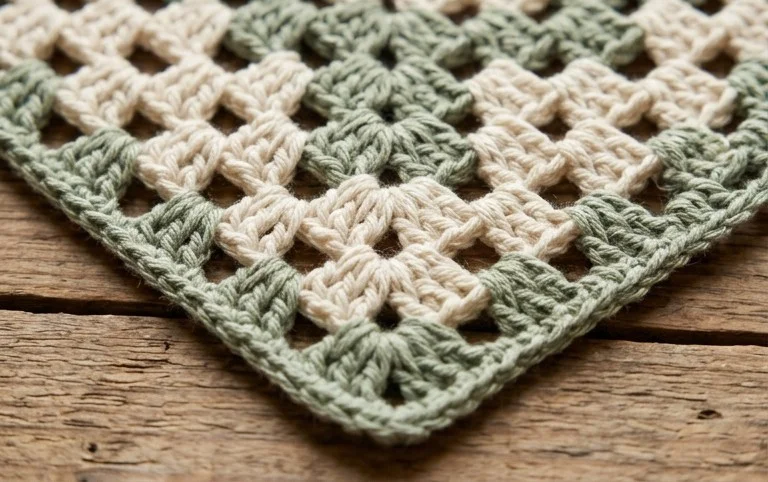
Your new triangle head scarf provides a charming vintage touch to any casual outfit, especially when crafted in breathable cotton yarn for warmer months. Try using a variegated colorway to give the clusters a different visual effect without changing your technique mid-stream. Once you finish weaving in your ends, take a photo of your work and post it to your favorite social media platform. You can find many more beginner-friendly items by browsing the remaining free projects on our blog throughout the week.